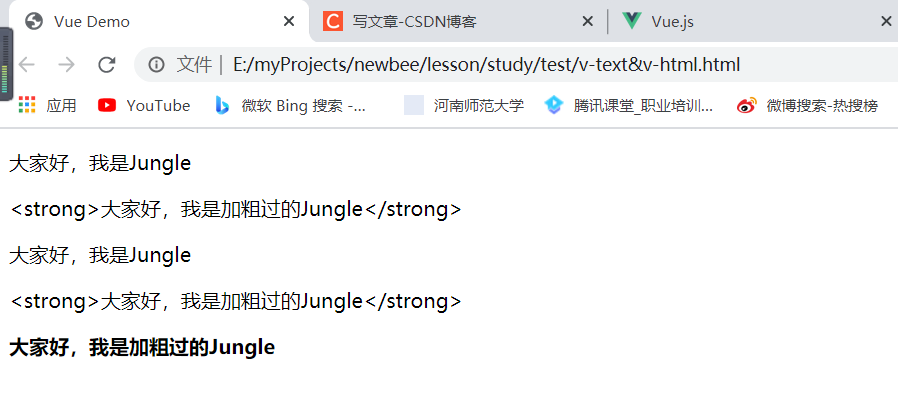
v-text:只能渲染纯文本,浏览器不会对其进行 html 解析
v-html:用于输出 html,浏览器会解析 html
下面通过代码实例来验证,代码如下:
1
2
3
4
5
6
7
8
9
10
11
12
13
14
15
16
17
18
19
20
21
22
23
24
25
26
27
28
29
30
31
32
33
34
35
| <!DOCTYPE html>
<html lang="en">
<head>
<meta charset="UTF-8">
<meta name="viewport" content="width=device-width, initial-scale=1.0">
<meta http-equiv="X-UA-Compatible" content="ie=edge">
<title>Vue Demo</title>
</head>
<body>
<div id='app'>
<p>{{ text }}</p>
<p>{{ html }}</p>
<p v-text="text"></p>
<p v-text="html"></p>
<p v-html="html"></p>
</div>
</body>
<script src="https://cdn.bootcss.com/vue/2.6.10/vue.min.js"></script>
<script>
window.onload = function () {
new Vue({
el: '#app',
data: {
text: '大家好,我是Jungle',
html: '<strong>大家好,我是加粗过的Jungle</strong>'
}
})
}
</script>
</html>
|
v-if、v-else && v-show
通过变量控制标签内容的显示或隐藏。
v-if 在浏览器上表现为整个 DOM 节点不会被渲染;
v-show 的呈现形式相当于给 DOM 节点添加了一个 CSS 属性 — display: none ;
v-else 则类似 JS 语法的 if else 判断语句,需要紧跟在 v-if 后面。
如果一个组件或者元素需要频繁的切换,就用v-show,如果在运行的时候很少改变的话,就用v-if。
下面通过代码实例来验证,代码如下:
1
2
3
4
5
6
7
8
9
10
11
12
13
14
15
16
17
18
19
20
21
22
23
24
25
26
27
28
29
30
31
32
33
34
| <!DOCTYPE html>
<html lang="en">
<head>
<meta charset="UTF-8">
<meta name="viewport" content="width=device-width, initial-scale=1.0">
<meta http-equiv="X-UA-Compatible" content="ie=edge">
<title>Vue Demo</title>
</head>
<body>
<div id='app'>
<p v-if="isShow">我是Jungle</p>
<p v-else>我是qiaosong</p>
<p v-if="!isShow">我是Jungle</p>
<p v-else>我是qiaosong</p>
<p v-show="!isShow">我是消失的Jungle</p>
</div>
</body>
<script src="https://cdn.bootcss.com/vue/2.6.10/vue.min.js"></script>
<script>
window.onload = function () {
new Vue({
el: '#app',
data: {
isShow: true,
}
})
}
</script>
</html>
|
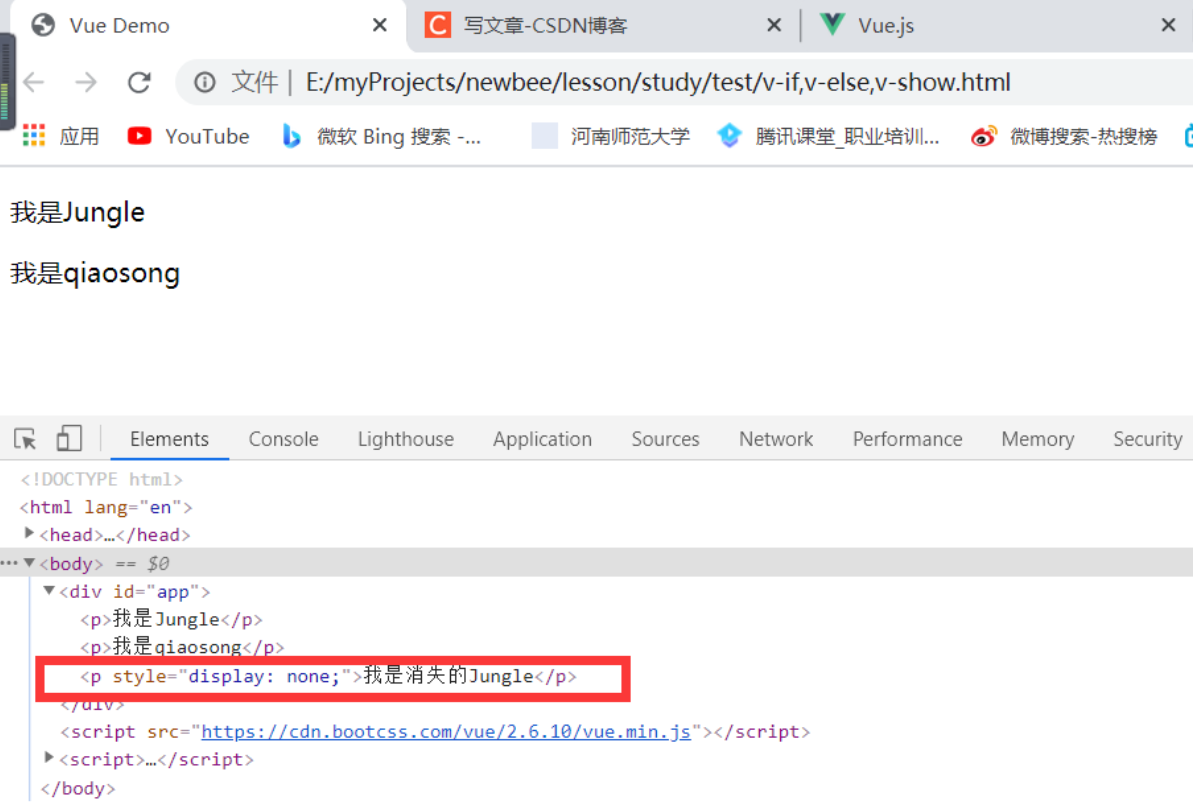
“我是消失的Jungle” 使用的是 v-show 的形式隐藏了 DOM 节点,正如上述所示,p 标签被添加了一个 display: none CSS 属性。而上面两个 p 标签在浏览器里 DOM 节点并没有被渲染出来。
v-for
v-for 指令解决的是模板循环渲染问题,没有 Vue、React等框架之前都是通过 for 循环拼接字符串的形式,通过 append 将拼接好的节点塞入指定的 DOM 节点。现在有了 v-for 指令,就不用这么麻烦了,得到数组之后,只需以 (item, index) in array 的形式渲染数据。
下面是代码演示:
1
2
3
4
5
6
7
8
9
10
11
12
13
14
15
16
17
18
19
20
21
22
23
24
25
26
27
28
29
30
| <!DOCTYPE html>
<html lang="en">
<head>
<meta charset="UTF-8">
<meta name="viewport" content="width=device-width, initial-scale=1.0">
<meta http-equiv="X-UA-Compatible" content="ie=edge">
<title>Vue Demo</title>
<style>
</style>
</head>
<body>
<div id='app'>
<div v-for="(item, index) in list">{{ index }}{{ item }}</div>
</div>
</body>
<script src="https://cdn.bootcss.com/vue/2.6.10/vue.min.js"></script>
<script>
window.onload = function () {
new Vue({
el: '#app',
data: {
list: ['小红', '小明', '小智', '小刚']
}
})
}
</script>
</html>
|
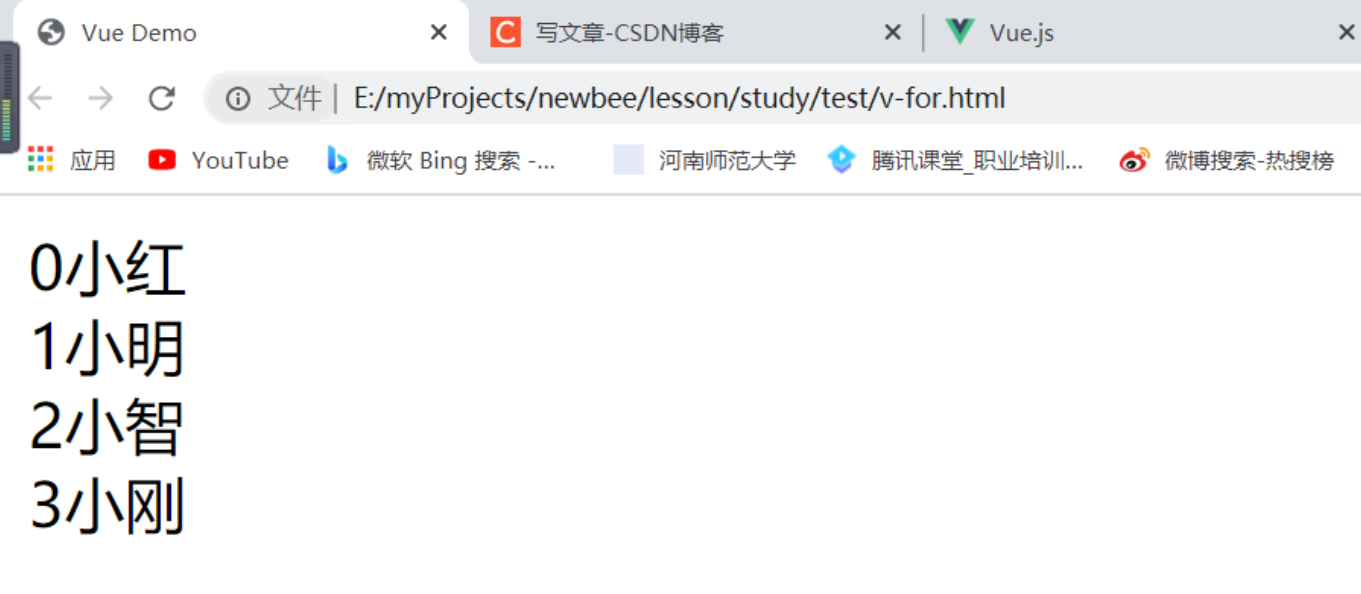
index 数组对象所对应的索引值,渲染模版的时候如果需要做一些逻辑运算的时候,会用到这个索引值,比如只让索引值为偶数的项进行渲染,就可以结合之前的 v-if、v-show 指令去实现需求。
小知识1:v-for 和 v-if 不要一起使用
v-for 的优先级高于 v-if ,当它们处于同一节点,v-for 的优先级比 v-if 更高,这意味着 v-if 将分别重复运行于每个 v-for 循环。比较好的解决方式是,先通过 computed 属性将需要渲染的列表提前过滤,再将过滤后的列表放到模板中渲染,这样做的目的是让页面渲染效率更高,避免不必要的资源浪费。
小知识2:v-for可以渲染 Object 类型数据
比如上述例子我们可以改成如下:
1
2
3
4
5
6
7
8
9
10
11
12
13
14
15
16
17
18
19
20
21
22
23
24
25
26
27
28
29
30
31
32
33
34
35
36
37
38
39
40
| <!DOCTYPE html>
<html lang="en">
<head>
<meta charset="UTF-8">
<meta name="viewport" content="width=device-width, initial-scale=1.0">
<meta http-equiv="X-UA-Compatible" content="ie=edge">
<title>Vue Demo</title>
<style>
</style>
</head>
<body>
<div id='app'>
<div v-for="(val, key, index) in listObj">{{ index }}{{ val.name }}</div>
</div>
</body>
<script src="https://cdn.bootcss.com/vue/2.6.10/vue.min.js"></script>
<script>
window.onload = function () {
new Vue({
el: '#app',
data:{
listObj: {
hong: {
name: '小红'
},
ming: {
name: '小明'
},
zhi: {
name: '小智'
},
gang: {
name: '小刚'
}
}
}
})
}
</script>
</html>
|
v-on
v-on 就是监听事件,可以用 v-on 指令监听 DOM 事件来触发一些方法函数。
v-on 有一种简写形式,用 @ 符号代替。它还能监听一些键盘事件,如键盘的回车键 v-on:keyup.enter 等,大家可以类推其他的键盘事件。
下面就来看看代码示例:
1
2
3
4
5
6
7
8
9
10
11
12
13
14
15
16
17
18
19
20
21
22
23
24
25
26
27
28
29
30
31
32
33
34
35
36
37
38
39
40
41
42
43
| <!DOCTYPE html>
<html lang="en">
<head>
<meta charset="UTF-8">
<meta name="viewport" content="width=device-width, initial-scale=1.0">
<meta http-equiv="X-UA-Compatible" content="ie=edge">
<title>Vue Demo</title>
<style>
</style>
</head>
<body>
<div id='app'>
<p>数字:{{ count }}</p>
<button v-on:click="add">加</button>
<br>
<hr>
<input v-model="username" v-on:keyup.enter="login" />
</div>
</body>
<script src="https://cdn.bootcss.com/vue/2.6.10/vue.min.js"></script>
<script>
window.onload = function () {
new Vue({
el: '#app',
data: {
count: 1,
username: ''
},
methods: {
add: function () {
this.count++
},
login: function () {
console.log(this.username)
}
}
})
}
</script>
</html>
|
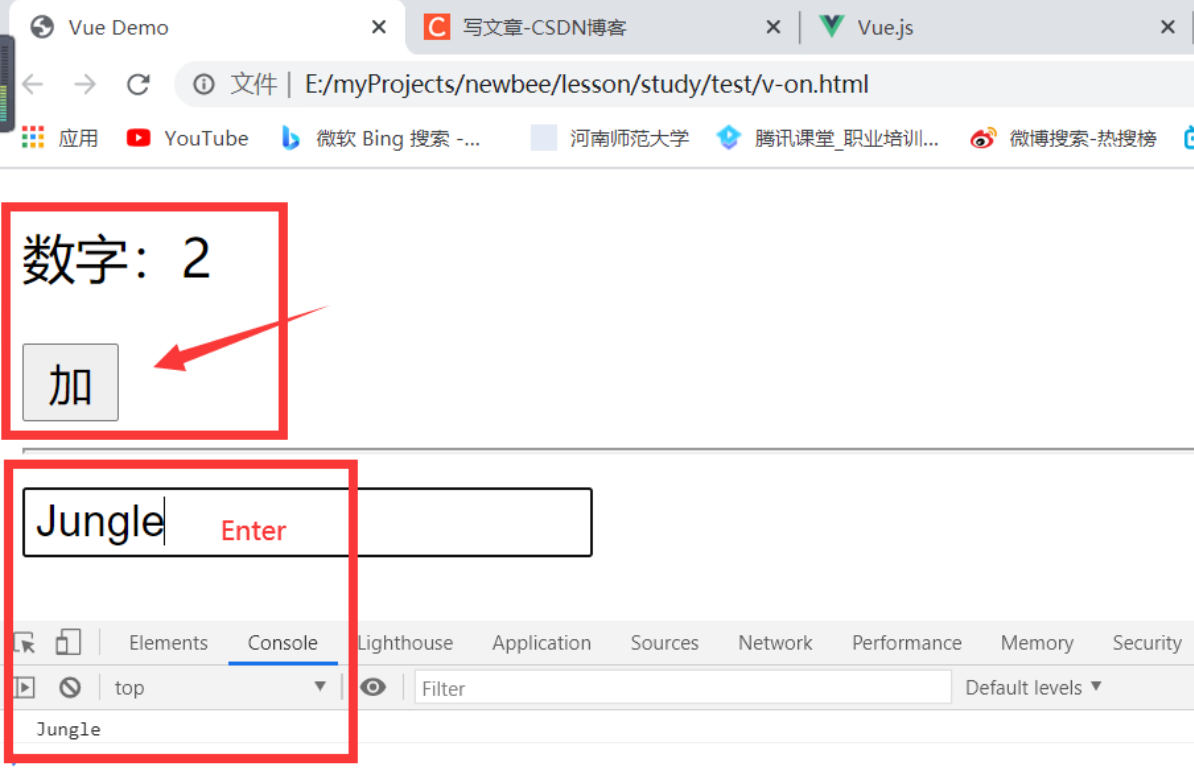
键盘事件一般用作输入框,用户名或密码的输入回车事件监听。
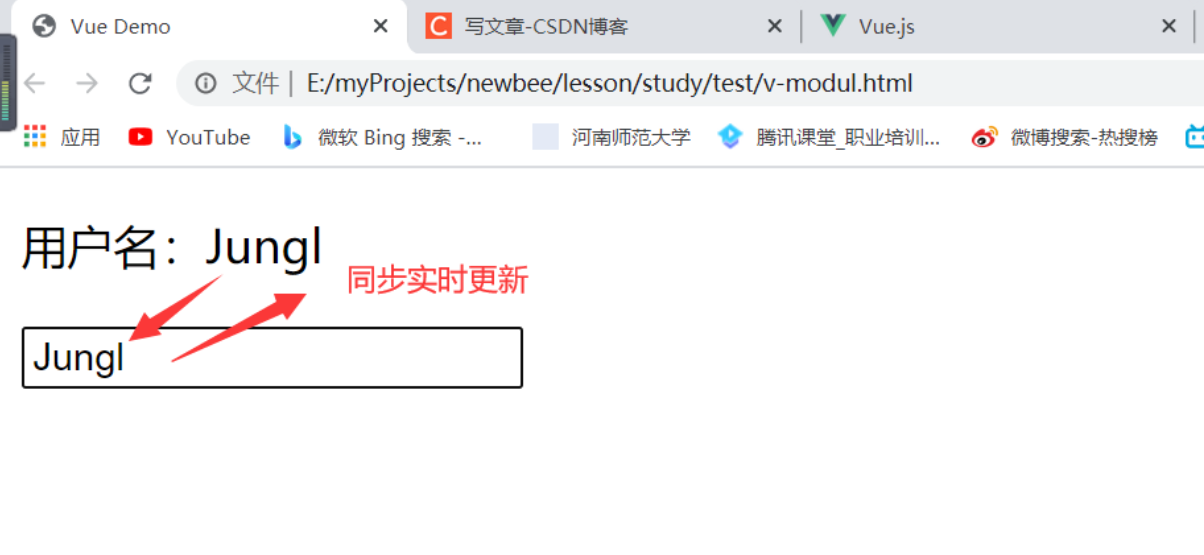
v-model
在 Vue 的众多指令里,v-model 算是举足轻重的,因为它的双向绑定特性,能解决很多业务上的复杂需求,下面就用几个小示例来诠释它的强大,代码演示如下:
1、最简单的双向绑定
1
2
3
4
5
6
7
8
9
10
11
12
13
14
15
16
17
18
19
20
21
22
23
24
25
26
27
28
29
30
31
| <!DOCTYPE html>
<html lang="en">
<head>
<meta charset="UTF-8">
<meta name="viewport" content="width=device-width, initial-scale=1.0">
<meta http-equiv="X-UA-Compatible" content="ie=edge">
<title>Vue Demo</title>
<style>
</style>
</head>
<body>
<div id='app'>
<p>用户名:{{ username }}</p>
<input v-model="username" />
</div>
</body>
<script src="https://cdn.bootcss.com/vue/2.6.10/vue.min.js"></script>
<script>
window.onload = function () {
new Vue({
el: '#app',
data: {
username: ''
}
})
}
</script>
</html>
|
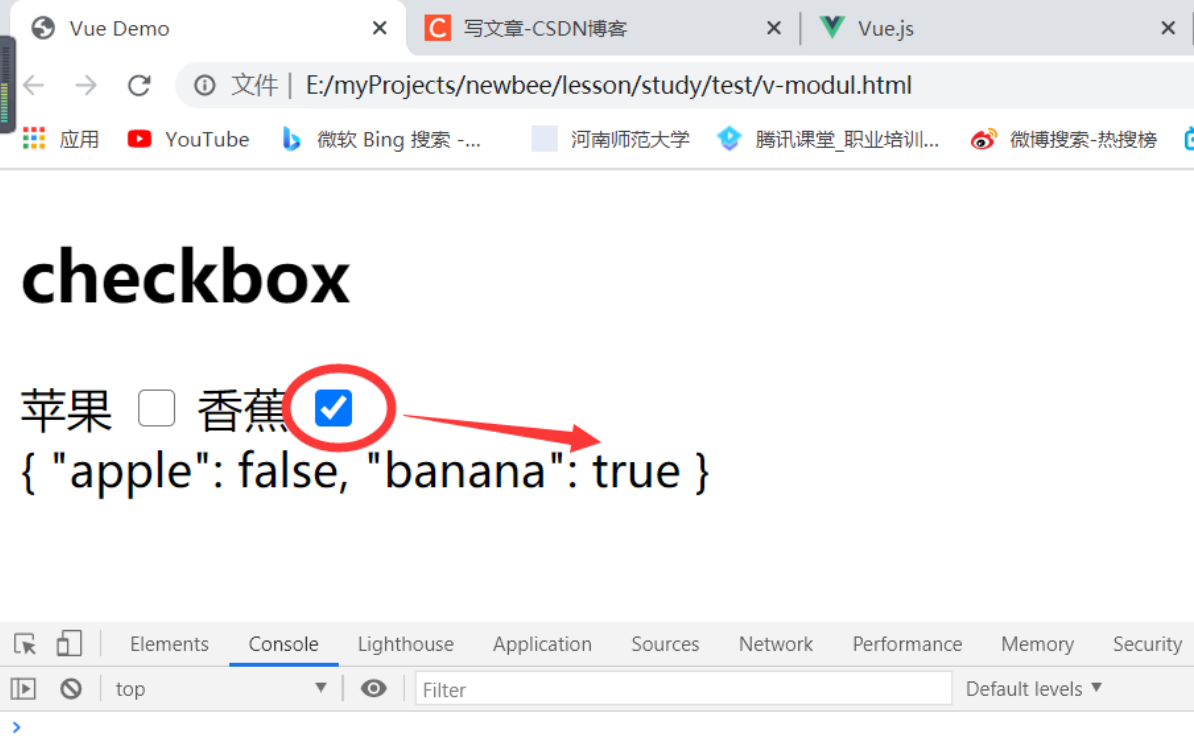
2、结合复选框
1
2
3
4
5
6
7
8
9
10
11
12
13
14
15
16
17
18
19
20
21
22
23
24
25
26
27
28
29
30
31
32
33
34
35
36
| <!DOCTYPE html>
<html lang="en">
<head>
<meta charset="UTF-8">
<meta name="viewport" content="width=device-width, initial-scale=1.0">
<meta http-equiv="X-UA-Compatible" content="ie=edge">
<title>Vue Demo</title>
<style>
</style>
</head>
<body>
<div id='app'>
<h2>checkbox</h4>
<label for="apple">苹果</label>
<input type="checkbox" v-model="fruit.apple" value="apple">
<label for="banana">香蕉</label>
<input type="checkbox" v-model="fruit.banana" value="banana">
</br>
{{ fruit }}
</div>
</body>
<script src="https://cdn.bootcss.com/vue/2.6.10/vue.min.js"></script>
<script>
window.onload = function () {
new Vue({
el: '#app',
data:{
fruit: {
apple: true,
banana: false
}
}
})
}
</script>
</html>
|
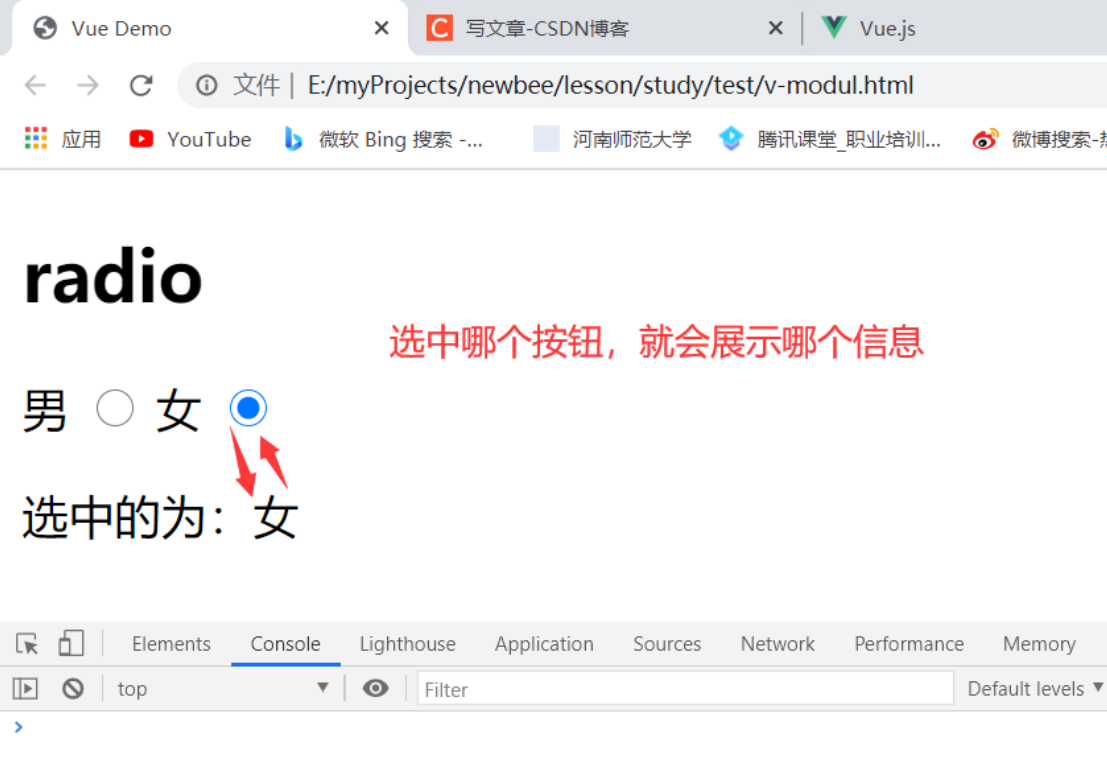
3、结合单选框
1
2
3
4
5
6
7
8
9
10
11
12
13
14
15
16
17
18
19
20
21
22
23
24
25
26
27
28
29
30
31
32
33
| <!DOCTYPE html>
<html lang="en">
<head>
<meta charset="UTF-8">
<meta name="viewport" content="width=device-width, initial-scale=1.0">
<meta http-equiv="X-UA-Compatible" content="ie=edge">
<title>Vue Demo</title>
<style>
</style>
</head>
<body>
<div id='app'>
<h2>radio</h4>
<label for="apple">男</label>
<input type="radio" v-model="sex" value="男">
<label for="banana">女</label>
<input type="radio" v-model="sex" value="女">
</br>
{{ sex }}
</div>
</body>
<script src="https://cdn.bootcss.com/vue/2.6.10/vue.min.js"></script>
<script>
window.onload = function () {
new Vue({
el: '#app',
data:{
sex: '男'
}
})
}
</script>
</html>
|
4、几个需要注意的修饰符
- .lazy:接管 input 的事件监听事件,输入的时候不会马上响应在展示层,当数据确认改变的时候才会显示出来;
- .trim:去掉首尾的空格,不会去除中间的空格;
- .number:输入的字符串转化为数字;
v-bind
对变量属性的一个绑定,比如说需要绑定一个图片只需如下:
1
2
3
| <img v-bind:src="imageSrc">
// 可简写为
<img :src="imageSrc">
|
绑定 CSS 样式,一般用在需要计算表达式的时候使用
1
2
3
4
5
6
7
| <div :class="className">绑定class</div>
// 判断变量
<div :class="{classA: isShow}">绑定class中的判断</div>
// 三元运算符
<div :class="isShow ? classA : classB">绑定class中的三元表达式判断</div>
// 绑定 style
<div :style="{color: blue, fontSize: font}">绑定style</div>
|
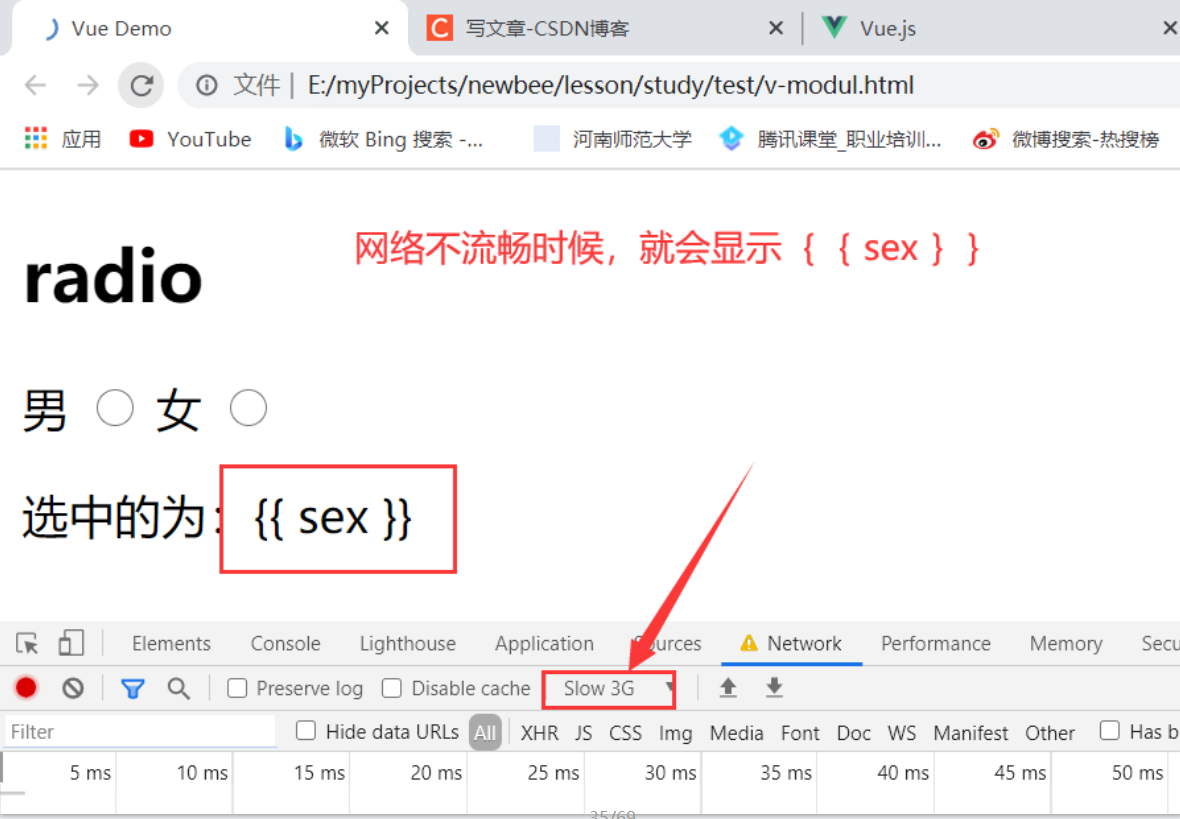
v-cloak
作用:这个指令保持在元素上直到关联实例结束编译。和 CSS 规则如 [v-cloak] { display: none } 一起用时,这个指令可以隐藏未编译的 Mustache 标签直到实例准备完毕。官方API 。
使用场景:,在介绍 v-model 的时候,第一个 demo 出现了双大括号闪烁的问题,如下图所示:
解决方法:
在 CSS 中加上如下属性:
1
2
3
| [v-cloak] {
display: none;
}
|
在绑定的变量的节点上加上 v-cloak
1
2
3
| <div id="app" v-cloak>
{{msg}}
</div>
|
注意:Vue 1.x 和 Vue 2.x 中 v-cloak 的用法是不同的。Vue1.x 中,允许将 Vue 实例挂载在 body 上,而 Vue2.x 是不允许的,想对整个页面实例化,需要另外用一个 div 来容纳整个页面内容,对其进行实例化。
试想用户打开网页,闪过一片 {{parmas}} ,不起眼的小指令,却极大的优化了网页的用户体验。
v-pre
直接跳过 Vue 的编译,输出原始值。在标签中如下使用:
1
| <div v-pre>{{message}}</div>
|
最终在网页上输出的结果是 {{message}}。
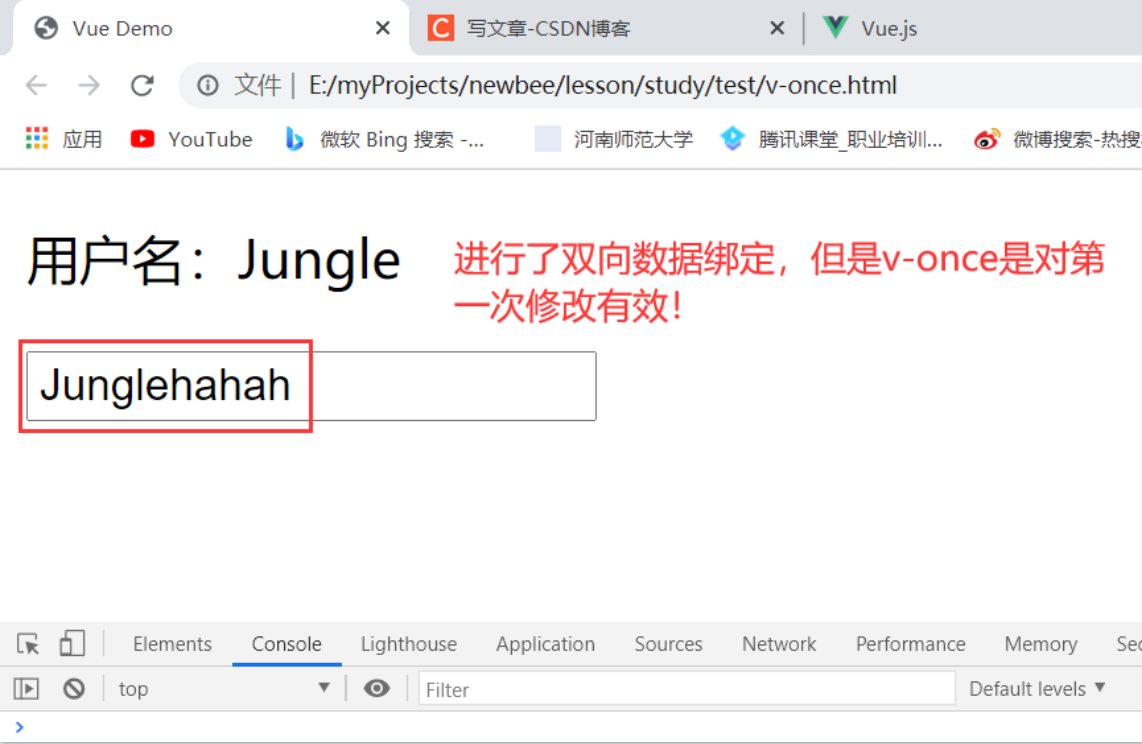
v-once
只在第一次渲染时执行,之后的操作都被视为静态内容,跳出之后的所有渲染过程。
1
2
3
4
5
6
7
8
9
10
11
12
13
14
15
16
17
18
19
20
21
22
23
24
25
26
27
28
29
| <!DOCTYPE html>
<html lang="en">
<head>
<meta charset="UTF-8">
<meta name="viewport" content="width=device-width, initial-scale=1.0">
<meta http-equiv="X-UA-Compatible" content="ie=edge">
<title>Vue Demo</title>
<style>
</style>
</head>
<body>
<div id='app'>
<p v-once>用户名:{{ username }}</p>
<input v-model="username" />
</div>
</body>
<script src="https://cdn.bootcss.com/vue/2.6.10/vue.min.js"></script>
<script>
window.onload = function () {
new Vue({
el: '#app',
data:{
username: '十三'
}
})
}
</script>
</html>
|
总结
基础 Vue 指令的一些实际应用,每个指令都只有亲身实践感受一下,才会有不一样的认识。
 微信
微信 支付宝
支付宝